Truss Analysis — Method of Joints
Method of Joints & Sections • Member Forces • Reactions • Deflection • Buckling — Simulate • Explore • Practice • Quiz
Display Controls
▦ All the numbers reactions, member forces, sections, deflection, checks
Member forces & checks
1 Overview
The Truss Analysis Simulator is a truss builder: draw any 2D pin-jointed truss — joints, members, pins and rollers on a floor, a ceiling or a wall, and loads — and it is solved live as you draw. Start from a blank board or from one of the templates (Warren, Pratt, Howe, K-truss, Pratt roof, Howe roof, Fink (W), a triangle or a wall cantilever); every template is an ordinary drawing you can change.
A structure check runs on every edit: it counts members m, reaction components r and joints j, compares m + r with 2j, and then checks the rank of the joint equations, because the count alone can be satisfied by a truss that still folds. A stable truss is solved by statics if it is determinate and by the direct stiffness method if it is indeterminate; a mechanism is refused and its free motion is animated in orange, so you can see which way it would fold.
2 Drawing: the five tools
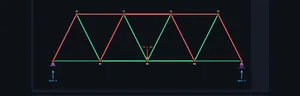
╱ Member (M): click two points to draw a member, and keep clicking to draw a chain; clicks snap to the grid (0.25/0.5/1 m, or ½/1/2 ft) or to a joint already there. A new point on a member splits it, and a member drawn through a joint is split there, so there are never two members in one place. Esc, a right-click or clicking the same point again ends the chain; you can also press and drag to draw one member.
△ Support (S): click a joint — pin, then roller, then none. In the inspector choose which side the ground is: floor, ceiling or wall. A pin gives two reaction components; a roller gives one, normal to the surface it rolls on. ⬇ Load (L): click a joint to hang a 5 kN block (1 kip in US units), again to stack another, right-click to take one off; the inspector sets any size and direction. ↖ Select (V) inspects and drags joints (on a phone, tap a joint first, then drag it); ⌫ Erase (E) removes a member, joint, load or support. Undo and Redo keep every step.
3 The inspector and the design
With nothing selected, the inspector beside the canvas shows the structure check — m, r, j, m + r − 2j and the rank — and says in plain words what is wrong with a mechanism (too few parts, a joint held by one member, every reaction parallel, a panel with no diagonal). For an indeterminate truss it splits the degree into external and internal and lists the redundant members: any one of them could go and the truss would still stand.
Select a joint to type its coordinates, set its support and edit its load; select a member to see its length, force, stress, slenderness, strength in tension and in compression (yield, or Euler buckling) and utilisation, and to give it its own section. The Design card sets the default section and the material, shows the mass, and ⚙ Size members for ×1.5 gives every member the lightest section that carries 1.5 times its force — watch the long struts grow, because buckling governs them.
4 Testing: load test, moving load, section, Show me How
▶ Load test grows the placed loads until the truss collapses. It sags (magnified), force dots stream along every member, a squeezed member bows more and more as it nears Euler’s load, and each failure is named on the canvas and marked on the load–deflection curve. A determinate truss collapses at its first failure; a redundant one redistributes and carries more. 🚚 Moving load drives a vehicle along the deck (the lowest line of joints) and plots the influence line of the selected member; the result lists each member’s worst tension and compression and flags stress reversals.
✂ Section: drag a straight cut across the truss; the equations of the free body give each cut force from one equation. ▶ Show me How works the method of joints step by step, and Σ Calculation shows the determinacy, the reactions, the member table, the deflection checked by virtual work, and the mass.
5 Challenges
🏁 Challenges fix a site — supports, loads and a build zone — for a footbridge, a sign bracket off a wall, a workshop roof and a two-span bridge. You design the truss and its sections. The grade is a load test and a stiffness check: ★ it carries 1.5× the design loads before collapse, ★★ its deflection is within the limit, ★★★ it is no heavier than the target, which is 15 % above a reference design the tool can show you. Your best result is remembered on this device.
6 Units, sharing, export and keyboard
2D / 3D: the canvas opens in 3D, the truss drawn as the structure it models: circular hollow steel tubes with flattened ends bolted to a gusset plate at every joint, a pin through each gusset, cast bearings on concrete (a roller bearing’s top plate slides on its rollers, which roll half as far) and the test weights on a hanger rod. Tube diameters are drawn thicker than true scale by the factor printed on the canvas; every force, reaction and click works exactly the same in 2D, the line diagram of the method of joints, one click away on the 2D / 3D toggle beside the zoom controls.
Units: SI (kN, m, mm, MPa, kg) or US customary / Imperial (kip, ft, in, ksi, lb); the choice is remembered across MechSimulator tools. Share your setup puts the whole drawing (and the challenge) in the link. CSV exports every member, joint, support and load; PNG exports the canvas. Export Report (beside the play button; it lights up once a load test has run to the end) opens a print-ready analysis report (structure and design, key results including the max stable load, the force diagram, loads and reactions, every member’s force and check, the failure sequence and the assumptions) — save it as a PDF from the print dialog. Keys: V M S L E for the tools, Delete, arrow keys to nudge the selected joint, Ctrl+Z / Ctrl+Shift+Z, Ctrl + wheel to zoom, Space to play a test.
7 Explore, Practice and Quiz
Explore covers 14 concepts in three groups — truss basics (what a truss is, the truss types, determinacy, indeterminate trusses, simple trusses), analysis methods (joints, sections, zero-force members, reactions) and forces and members (tension, compression, joint equilibrium, buckling, deflection). The diagrams are drawn by the same solver, so the colours are real results, and each concept has a worked example.
Practice draws a real truss and asks for a reaction, a member force (by sections or joints), the number of zero-force members, the determinacy count, an elongation or an Euler buckling load, then shows the full solution. Problems are generated in whichever unit system is active. Quiz gives 6 questions drawn at random with shuffled answers and reports each one.
Truss Analysis — Method of Joints and Sections

Truss analysis is a fundamental topic in structural mechanics. A truss is a structure composed of slender members connected at joints (nodes), designed to carry loads efficiently through axial forces only — each member is either in tension (being pulled apart) or compression (being pushed together). Understanding truss behaviour is essential for designing bridges, roof structures, transmission towers, and crane booms.
The three most common truss types are the Warren truss (diagonal members alternate in direction, forming a W-pattern), the Pratt truss (verticals and diagonals sloping toward the centre), and the Howe truss (verticals and diagonals sloping away from the centre). Each type distributes forces differently through its members.
How Truss Analysis Works
The method of joints analyses equilibrium at each joint of the truss. Since all forces at a joint are concurrent (meeting at a single point), only two equilibrium equations apply: ΣFx = 0 and ΣFy = 0. Starting from a joint with at most two unknowns, the analyst systematically solves for member forces throughout the entire truss. A positive result indicates tension, while a negative result indicates compression.
The method of sections is useful when only a few member forces are needed. A virtual cut is made through the truss, dividing it into two parts, and equilibrium of one part is analysed using three equations: ΣFx = 0, ΣFy = 0, and ΣM = 0.
Zero-Force Members and Determinacy
Zero-force members carry no load under certain conditions: (1) at a joint with only two non-collinear members and no external load, both members are zero-force; (2) at a joint with three members where two are collinear, the third is a zero-force member (if no external load is applied). A truss is statically determinate when m + r = 2j, where m = number of members, r = number of reactions, and j = number of joints.
How to Use This Simulator
In Simulate mode, draw your own truss with the Member, Support and Load tools, or start from one of seven templates (Warren, Pratt, Howe, K-truss, Pratt roof, Howe roof, Fink) and change it. The canvas colours every member — green for tension, red for compression, grey for zero force — and the cards and table give reactions, member forces, deflections and a yield and buckling check. Show me How works the method of joints step by step, Section cuts the truss for the method of sections, and Calculation shows the full working. Switch to Explore for 14 concepts with worked examples, Practice for problems drawn on real trusses, and Quiz for 6 randomised questions. Everything works in SI or US customary units.
Design and Test Your Own Truss Bridge — a 2D Truss Simulator
This is a 2D truss simulator you build yourself. Draw members on a snap grid, put pins and rollers where the bridge meets the ground — on a floor, a ceiling or a wall — and hang loads on the joints. Every edit is solved at once: each member turns green in tension or red in compression, with its force, and the support reactions appear under the supports. Start from a blank board, or from a Warren, Pratt, Howe, K, roof or Fink template and change it.
Many simple truss simulators refuse to solve anything that fails the count m + r = 2j. This one tells you why a drawing cannot stand. It checks the count and then the rank of the joint equations, because a truss can pass the count and still fold; a mechanism is animated in orange so you can see the way it moves. It also solves statically indeterminate trusses — an extra diagonal, a third support — by the direct stiffness method, and lists which members are redundant: any one of them could be removed and the truss would still stand.
Then test the design the way an engineer would. The load test grows the loads until the bridge collapses and names each member as it yields or buckles. The moving load drives a vehicle across the deck and draws the influence line of any member, flagging members whose force reverses as the load passes. A section cut can be drawn at any angle, and Show me How works the method of joints step by step. The design challenges — a footbridge, a sign bracket off a wall, a workshop roof and a two-span bridge with a middle pier — fix the supports and loads and grade your truss: one star if it carries 1.5 times the loads, two if it is stiff enough, three if it is also light.
Tension and Compression in Warren, Pratt and Howe Trusses — Member by Member
Which members are pulled and which are pushed depends on the pattern. The table is the simulator’s own solution for each template, 6 panels, 12 m span, 3 m deep (the Fink has its fixed 3 panels), with an equal load P at every joint of the loaded chord — the bottom chord of a bridge, the top chord of a roof. Each entry gives the sense of the force and the largest force in that group as a multiple of P. Double every load and every force doubles; the pattern of tension and compression does not change.
| Truss | Top chord | Bottom chord | End posts | Diagonals | Verticals |
|---|---|---|---|---|---|
| Warren | compression, 3.00P | tension, 2.83P | — | alternate tension / compression, 2.64P | — |
| Pratt | compression, 3.00P | tension, 2.67P | compression, 3.00P | tension, 1.80P | compression (interior); the two beside the supports are tension hangers, P; the centre one is zero |
| Howe | compression, 2.67P | tension, 3.00P | compression, 3.00P | compression, 1.80P | tension, 2.50P |
| K-truss | compression, 3.08P | tension, 2.92P | compression, 1.25P | both, 2.08P | both, 1.75P |
| Pratt roof | compression, 5.59P | tension, 5.00P | — | tension, 1.80P | compression, 1.50P; the king post is zero |
| Howe roof | compression, 5.59P | tension, 5.00P | — | compression, 1.41P | tension, 2.00P; the two next to the supports are zero |
| Fink (W) | compression, 3.35P | tension, 3.00P | — | both, 0.90P | — |
Three things to notice. The top chord is always in compression and the bottom chord always in tension under gravity loads — the truss behaves like a deep beam. Pratt diagonals are in tension and Howe diagonals in compression, which is why steel favoured the Pratt (long members in tension cannot buckle) and timber the Howe. And the pitched roof trusses carry the largest chord forces for the same loads, because their depth tapers to nothing at the supports. Try any of them: pick the template, hang a load on every joint of the loaded chord, and read the colours.
Watching a Truss Fail: What the Load Test Teaches
A truss analysis gives member forces for one load. A load test asks the engineer’s real question: how much can it take, and what gives way first? The simulator scales the placed weights up steadily. While every member is elastic the forces grow in proportion, so the load–deflection curve is a straight line. Each member has a limit — fyA in tension, and in compression the smaller of fyA and Euler’s buckling load Pcr = π²EI/L² — and because the forces are linear in the load, the load at which the first member reaches its limit is found exactly.
What happens next depends on redundancy. In a statically determinate truss every member is essential: remove any one and the truss becomes a mechanism, so the first member failure is the collapse. A redundant truss can lose a member and redistribute its load — the failed member keeps carrying its limit force (a buckled strut plateaus near Pcr) while the rest take the increase — and the curve bends at a kink before the final collapse. This event-to-event method gives the same collapse load as the lower-bound theorem of plasticity, which the simulator’s test suite checks independently. Long compression members are usually the weak link: halving a strut’s length quadruples Pcr, which is why real trusses brace their compression chords. Euler’s load is the ideal elastic limit; design codes (AISC 360, EN 1993-1-1) reduce it further for real, imperfect struts.
Determinate or Indeterminate? Why the K-Truss Needs Stiffness
Counting is the first test: a plane truss with m members, j joints and r reactions is statically determinate when m + r = 2j. But the count is not enough — members can be arranged so that some joint equations repeat each other, and then even the right count collapses. The simulator therefore checks the rank of the 2j joint equations. A truss with m + r > 2j and full rank is statically indeterminate: equilibrium alone has infinitely many solutions, and the forces that actually occur are the ones whose member stretches fit together. The K-truss here, with a K in every panel, has m + r − 2j = 1, so it is solved by the direct stiffness method, and the method of joints and the method of sections are switched off for it.
Spot the Zero-Force Members First — A Shortcut Worth Memorising
Most students start a truss problem by picking a joint and writing equations. There is a much faster opening move: look at the whole truss for zero-force members and cross them off before you do any algebra.
Two patterns to look for:
- Two-member, no-load joint. If a joint has exactly two members coming into it and no external load is applied there, both members carry zero force. The proof is one sentence: equilibrium requires both members to balance, but with only two non-collinear members and no load, the only solution is F₁ = F₂ = 0.
- Three-member, two-collinear-no-load joint. If a joint has three members, two of them collinear, and no external load, the third (non-collinear) member is zero-force. The collinear pair carries the load straight through; nothing is left to balance the third.
Under a single load at the middle of its bottom chord, a 6-panel Pratt truss has three zero-force members — the first and last verticals (B1–T1 and B5–T5) and the central one (B3–T3) — and all three are found by the rules without a single equation (try it: Templates → Pratt, 6 panels, then hang a load on the middle bottom joint). Identifying them first shortens the algebra. In the simulator, zero-force members appear in grey — the visual reinforces the habit. After a few problems students learn to spot them by eye in about ten seconds.
Method of Joints Worked End-to-End — A Simple 4-Joint Truss
Take a simple triangulated truss: a horizontal bottom chord 8 m long between joints A and B, with a peak joint C at the centre 3 m above. Pin support at A, roller at B. A vertical load of 12 kN is applied downward at C. Find the forces in all three members.
| Step | Equation | Working | Result |
|---|---|---|---|
| Take moments about A to find RB | ΣMA = 0 | 12×4 = RB×8 | RB = 6 kN ↑ |
| Vertical equilibrium for RA,y | ΣFy = 0 | RA,y + 6 − 12 = 0 | RA,y = 6 kN ↑ |
| Horizontal equilibrium for RA,x | ΣFx = 0 | no horizontal loads | RA,x = 0 |
| Angle of AC from horizontal | θ = arctan(3/4) | — | 36.87° |
| Joint A: sum vertical (FAC sinθ + 6 = 0) | FAC·sin36.87° = −6 | — | FAC = −10 kN (10 kN compression) |
| Joint A: sum horizontal (FAB + FAC·cosθ = 0) | FAB + (−10)·cos36.87° = 0 | FAB = 8 | FAB = 8 kN tension |
| Joint B (symmetric) | (same logic, mirrored) | — | FBC = 10 kN compression |
Sanity check at joint C: the two top chord members each carry 10 kN compression at 36.87°. Vertical components: 2×10×sin36.87° = 12 kN, which equals the applied load. Horizontal components: 10·cos36.87° in each direction, equal and opposite, cancel. The system balances.
Method of Sections — When the Method of Joints Is Too Slow
If you only need the force in one member of a 20-panel truss, working through joints from one end is wasteful. The method of sections cuts a single line through three (or sometimes more) members and uses moment equilibrium of the cut-off portion to solve directly.
The rule of thumb: section through three members at most, because you only have three equilibrium equations (ΣFx, ΣFy, ΣM) in 2D. Choose your moment centre at the intersection of two of the unknown members — this eliminates them and leaves a single-unknown equation in the third. The classic example is the lower-chord force in a Pratt truss: section vertically through one panel, take moments about the upper joint, and the lower-chord force falls out in one line. In the simulator, the ✂ Section button draws the cut on the canvas, fades the part you are not using, marks each moment centre and writes out the equation for every cut member, so you can see which members are sectioned and check each value against the full solution.
The Bridge-Truss Family Tree — Why Engineers Picked These Shapes
| Truss type | Pattern | Best for | Why |
|---|---|---|---|
| Pratt | Diagonals slope DOWN toward centre, verticals carry compression | Steel railway / highway bridges | Long diagonals in tension; short verticals in compression — matches steel’s natural strengths |
| Howe | Diagonals slope UP toward centre, verticals in tension | Timber bridges (19th century North America) | Diagonals in compression suit timber (good in compression, weaker in tension); verticals were iron tie rods |
| Warren | Alternating diagonals, no verticals | Footbridges, light roof trusses, aircraft hangar roofs | Fewest members — light, efficient, and clean visually |
| K-truss | K-shaped sub-panels | Very tall bridges (Forth Bridge, Quebec Bridge) | Distributes compression among shorter sub-members, reducing buckling length |
| Bowstring | Curved top chord, straight bottom chord | Roof trusses, arena spans | Top chord follows funicular line, near-uniform compression all along |
| Fink | Triangulated W-pattern in roof trusses | Residential and light commercial roofs | Short top-chord segments, easy to assemble from standard timber lengths |
The choice between Pratt and Howe was historically a material decision — iron-and-steel age picked Pratt, timber-and-iron-rod age picked Howe. Today, with all-steel construction dominating, Pratt and Warren cover most highway bridges and Fink covers most residential roofs. The simulator lets you switch between Pratt, Howe and Warren on the same span to see how member forces redistribute.
Frequently Asked Questions
Can I design my own truss and test it?
Yes. The simulator is a 2D truss builder: draw members on a snap grid, place pins and rollers on a floor, a ceiling or a wall, and hang loads on the joints. Every edit is solved at once, member by member, in tension or compression. Then test it: a load test grows the loads until the truss collapses, a moving load drives a vehicle across the deck and plots each member's influence line, and design challenges (a footbridge, a wall bracket, a roof and a two-span bridge) grade the design by strength, stiffness and mass.
What is the method of joints in truss analysis?
The method of joints analyses a truss by isolating each joint (node) and applying equilibrium equations (sum of forces in X = 0, sum of forces in Y = 0). Starting from a joint with at most two unknown member forces, you solve for those forces and proceed joint by joint through the entire truss.
What is the difference between Warren, Pratt, and Howe trusses?
A Warren truss uses diagonal members in an alternating pattern without verticals. A Pratt truss has vertical members and diagonals that slope toward the centre, placing diagonals in tension under gravity loads. A Howe truss reverses the diagonal direction so they slope away from the centre, putting diagonals in compression.
What are zero-force members in a truss?
Zero-force members carry no load under the given loading conditions. They can be identified by two rules: if only two non-collinear members meet at an unloaded joint, both are zero-force members; and if three members meet at an unloaded joint with two being collinear, the third is a zero-force member. They provide stability and support under different load cases.
How does the method of sections work?
Cut the truss through no more than three members of unknown force and take one side as a free body. Taking moments about the point where two of the cut members meet removes them from the equation and gives the third directly; if two cut members are parallel, resolve forces perpendicular to them instead. In this simulator, open Section and drag a straight cut across the truss at any angle: it draws the cut forces on the free body and writes the equation that gives each one.
Why is my truss a mechanism when m + r = 2j?
Because the count is necessary but not sufficient. m + r = 2j says there are as many unknowns as joint equations, but if the members are badly arranged some equations repeat each other and the truss can still move: a four-sided panel with no diagonal folds, and three parallel rollers let the whole truss slide. The test that decides is the rank of the joint equations. This simulator checks the rank on every edit and animates the free motion of a mechanism so you can see which way it folds.
What makes a truss statically indeterminate?
A stable truss is statically indeterminate when it has more unknown member forces and reactions than independent equilibrium equations, so m + r - 2j is greater than zero. Its member forces then depend on the stiffness of the members, not on equilibrium alone. The K-truss in this simulator, with a K in every panel, is indeterminate to degree 1 and is solved by the direct stiffness method.
What does an influence line show for a truss member?
An influence line shows the force in one member as a single unit load moves across the deck. For a truss loaded through its deck joints it is a straight line between panel points, so its peaks sit at joints. Multiplying by the vehicle weight gives the member's worst tension and worst compression; a member whose influence line changes sign suffers a stress reversal as the load passes and must be designed for both.
Books and References for Going Deeper
- Hibbeler, R. C. — Structural Analysis, 10th ed., Pearson, Chapters 3 (Analysis of Statically Determinate Trusses) and 4 (Influence Lines).
- Norris, C. H., Wilbur, J. B. & Utku, S. — Elementary Structural Analysis, 4th ed., McGraw-Hill. The classical treatment, with excellent worked examples.
- AISC Steel Construction Manual, 15th ed. — for member selection (W-sections, HSS) once the analysis gives you the forces.
- Eurocode 3 (EN 1993-1-1) — the European steel design code; truss connections are covered in EN 1993-1-8.
- IS 800:2007 — the Indian Standard for steel construction, widely cited in technical-education syllabi.
Explore Related Simulators
If you found this Truss Analysis simulator helpful, explore our Beam Bending simulator, Mohr’s Circle simulator, Stress–Strain Curve simulator, and Free Body Diagram & Force Resolver for more hands-on practice. Members carrying compression in a truss can buckle long before they yield; the Column Buckling simulator finds the Euler critical load for that member.
Updated