Torque Wrench Simulator
Set it, lock it, pull to the click — click, digital & beam wrenches in 2D and 3D
Display Controls
Σ Live equation — what the bolt gets for the setting on screen
1 Overview
The simulator is a workbench with a bolt in a steel block and a torque wrench. You choose the job, the wrench, the socket and any attachment, set the wrench, and tighten the bolt by pulling the handle. It models a click (micrometer) wrench, a digital wrench and a beam wrench, a metric (SI) kit and a SAE (Imperial) kit, and four modes: Simulate, Explore, Practice and Quiz.
2 Getting Started
Just follow the box under the picture. It always shows the one thing to do next (“Step 2 of 9: fit the socket that matches the 16 mm bolt head”) with that step’s own buttons, and an amber marker on the picture shows where it happens. If you press something too early, the picture tells you why. The four cards on the right hold every setting for when you want to change the job: 1 the job (fastener and spec, hard or gasketed joint), 2 the wrench (type, drive and range, condition), 3 the socket and any attachment, 4 the setting and how you pull. The Job card under the canvas ticks each step of a correct pull as you complete it and explains the result when you finish. Press 🎓 Show me how to watch the simulator do a perfect job, step by step.
The page opens in 3D on a computer or tablet and in 2D on a phone; the 2D | 3D switch is at the left of the bar under the canvas and the page remembers your choice. Add ?view=2d or ?view=3d to a link to open a view.
3 Simulate Mode
- Setting a click wrench. Press Unlock handle in the step box, then use − turn / + turn and − / + there, or drag the thimble in the scale close-up (top right of the canvas) up or down, or use − turn / + turn and the one-division stepper. Lock the handle again before you pull: an unlocked handle turns in your hand.
- Digital and beam. Key in a target (digital) or the reading you are aiming for (beam). The digital wrench beeps faster from 90 % and gives a long tone at the target; the beam pointer moves along its scale.
- Tightening. Drag the handle clockwise on the canvas (in 3D, drag the handle itself). Where you grab it is where your hand is. Or press Pull slowly in the step box, choosing the speed beside it: it ratchets back when the swing runs out and stops a quarter of a second after the click, as a real hand does.
- What to watch. The gauge under the canvas shows the torque on the bolt against the spec, the ±6 % band and the yield point; the trace shows torque against the nut's angle, with the click marked; the red paint mark on the hex shows the nut turning.
- Things to try. Pull with the Fast jerk speed; hold the wrench nearer the head; use a crowfoot without correcting the setting; leave the lever on L; use the dropped wrench; pick a wrench whose range is far too big.
4 The Job Card and Show Me How
The job card lists nine steps: choose a wrench in range, fit the socket, lever to R, set the wrench (lower for an in-line crowfoot), lock it, hand on the load line, pull slowly and stop at the click, finish within ±6 % of the spec, and wind it down to its lowest mark. A tick means done right, a cross means done wrong, and the result box says exactly what changed the torque and by how much. New job deals a random fastener, sometimes with a crowfoot or the lever left on L. Show me how runs eleven steps with captions; use ⏮ ⏭ or the arrow keys to step and Esc to close.
5 Explore, Practice & Quiz
Explore has sixteen cards in four groups: Using it right, Wrench types, Units & attachments, and Standards & care. Practice mixes six kinds of problem: reading the micrometer scale (drawn for you), crowfoot correction, unit conversion, the effect of hand position, torque to clamp force, and whether a wrench's range suits a job. Each follows the SI | Imperial switch. Quiz asks six questions drawn from a pool of twenty, with the options shuffled, and scores you with up to three stars.
6 SI vs Imperial
The switch changes the whole kit, not just the labels. SI gives metric wrenches graduated in N·m (5–25, 20–100, 40–200 and 100–500 N·m), metric sockets in millimetres and ISO class 8.8 bolts. Imperial gives US wrenches in lbf·in (20–200) and lbf·ft (10–80, 20–150, 100–600), SAE sockets in fractions of an inch and SAE grade 5 bolts. The square drives are the same in both kits — 1/4, 3/8, 1/2 and 3/4 inch — because ISO 1174-1 uses the inch sizes too. Example: an M10 class 8.8 bolt is 50 N·m on a 3/8 in, 20–100 N·m wrench with a 16 mm socket; a 1/2-13 grade 5 bolt is 75 lbf·ft on a 3/8 in, 10–80 lbf·ft wrench with a 3/4 in socket.
7 Key Concepts
T = F × L. A click wrench senses the moment at its mechanism, a distance a from the drive square, so the bolt gets T/S = (L₀ − a)/L₀ × (Lh + E)/(Lh − a) times the setting S, where L₀ is the load line, Lh your hand and E an attachment's length along the handle. On the load line with no attachment that ratio is exactly 1. For an in-line crowfoot set S = T × L/(L + E). The bolt specs are worked out from T = K·F·d with K = 0.20 and a preload of 75 % of the proof load.
8 Tips & Other Features
Sounds: a sharp click when the wrench trips, a soft ratchet tick on the back-swing, a detent tick for each division, beeps from the digital wrench, and a chime or buzz for the result (Sound on/off in the rail). Σ Calculations opens the full working for the job on screen; PNG or a right-click (long-press) saves the view, copies the readings or starts Show me how. Display Controls (top left of the canvas) hide the labels, the force arrow, the scale close-up or the trace.
How to Use a Torque Wrench — an Interactive Torque Wrench Simulator
A torque wrench tightens a bolt to a specified torque so that it reaches the right clamp force: tight enough not to work loose, not so tight that it stretches. This simulator lets you practise the whole job on a virtual bench — choosing the wrench, fitting the socket, setting the scale, and pulling a real bolted joint to the click — and shows you, in numbers, what each common mistake does to the bolt.
How to Use a Torque Wrench, Step by Step
- Find the spec in the manual, in N·m or lbf·ft.
- Choose the wrench. The spec should sit between 20 % and 100 % of the wrench's maximum — below 20 % it is not calibrated.
- Fit the right socket: metric heads need metric sockets, SAE heads need inch sockets.
- Set the reversing lever to tighten (R for a right-hand thread).
- Unlock the handle, wind up to the setting, lock it.
- Hold the grip on its load line and pull at right angles to the handle.
- Pull slowly and steadily, and stop at the click. Do not pull again to check.
- Wind it down to the lowest mark on the scale before you put it away.
How to Set and Read a Click Torque Wrench
A click wrench's handle is a micrometer, like the thimble of a screw gauge. The barrel carries one line per turn; the thimble carries the divisions inside a turn. Read the last barrel line the thimble edge has uncovered and add the thimble line on the datum line. On a 40–200 N·m wrench one turn is 10 N·m in ten 1 N·m divisions, so barrel 90 and thimble 7 is 97 N·m. If you overshoot, wind below the setting and come back up to it.
Torque Wrench Drive Sizes and Ranges (SI and Imperial)
| Square drive | Metric wrench (simulator) | US wrench (simulator) | Typical jobs |
|---|---|---|---|
| 1/4 in (6.3 mm) | 5–25 N·m | 20–200 lbf·in | Small screws, M6–M8, 1/4-20, spark plugs |
| 3/8 in (10 mm) | 20–100 N·m | 10–80 lbf·ft | M10–M12, 3/8-16, 1/2-13, wheel nuts on small cars |
| 1/2 in (12.5 mm) | 40–200 N·m | 20–150 lbf·ft | Wheel nuts, suspension, 5/8-11 |
| 3/4 in (20 mm) | 100–500 N·m | 100–600 lbf·ft | M16 and larger, trucks, plant |
The square drives are inch sizes in both systems — ISO 1174-1 gives them as 6.3, 10, 12.5 and 20 mm — so a metric socket and a SAE socket of the same drive fit the same wrench. What differs is the hex: a 1/2 in socket on a 13 mm nut is 0.3 mm loose and rounds the corners.
Click vs Digital vs Beam Torque Wrench
- Click (micrometer): a spring sets the moment at which a cam block trips. Quick and repeatable; must be stored at its lowest setting.
- Digital: a strain gauge and a display; key in a target and it beeps as you approach it. Can log and hold the peak.
- Beam: the handle bends and a pointer reads the torque on a scale. Nothing to set or wear, and it reads the torque at the square wherever you push on its pivoting grip, but you must watch it square-on.
Torque Wrench Extension and Crowfoot Formula
A straight extension bar changes nothing: it is in line with the drive. An attachment that carries the socket along the handle — a crowfoot, an offset adapter — lengthens the lever arm, so set the wrench lower:
S = T × L / (L + E)
For a 60 N·m spec on a wrench 355 mm from square to load line, with a 50 mm crowfoot in line: S = 60 × 355 / 405 = 52.6 N·m. Turn the crowfoot to 90° and no correction is needed.
Converting N·m, lbf·ft and lbf·in
1 lbf·ft = 1.3558 N·m, 1 lbf·in = 0.11298 N·m and 1 lbf·ft = 12 lbf·in. So 50 N·m is 36.9 lbf·ft, and 101 lbf·in is 8.4 lbf·ft — small enough that it is set on an inch-pound wrench.
Common Torque Wrench Mistakes
- Pulling fast. Your arm keeps going for about a quarter of a second after the click. At 5°/s that is inside the handle's break; at 45°/s it turns the nut several degrees further and adds tens of per cent.
- Holding it near the head. The click mechanism senses the moment a few centimetres from the square, so a short grip puts more torque on the bolt than the setting.
- Using a range that is too big. Below 20 % of its maximum a wrench is not certified.
- Loosening with it, or using a wrench that has been dropped and not re-calibrated.
- Storing it wound up, so the spring takes a set and reads low.
Why Torque? From Torque to Clamp Force
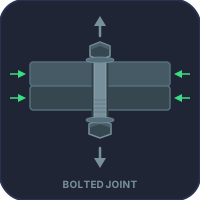
Torque is only a way to reach a bolt tension. Most of it goes in friction under the head and in the thread, which the nut factor K lumps together: T = K·F·d. The simulator works out each bolt's spec this way, with K = 0.20 and a preload of 75 % of the proof load: an M10 class 8.8 bolt is 0.20 × 25.2 kN × 0.010 m = 50 N·m, and a 3/8-16 grade 5 bolt is 31 lbf·ft. See the Bolted Joint Design tool for what that preload does in the joint.
Standards
ISO 6789-1:2017 and ASME B107.300 set the accuracy of hand torque tools: ±4 % of the set value for the common click and indicating wrenches (ISO: ±6 % for wrenches with a maximum of 10 N·m or less), checked at 20 %, 60 % and 100 % of the maximum. ISO 6789 also calls for re-calibration every 12 months or 5000 cycles, and after any overload or drop.
Who Uses This Simulator?
Automotive, aviation and maintenance apprentices learning to use a torque wrench before they touch a car or an engine; mechanical engineering and vocational students studying fastening; instructors who want to show what a fast pull or a crowfoot does to a bolt without stripping one; and DIY mechanics who want to get their first wheel change right.
Frequently Asked Questions
How do you use a torque wrench properly?
Choose a wrench whose range holds the specified torque between 20 % and 100 % of its maximum, fit the correct socket, set the reversing lever to tighten, unlock the handle, wind the scale up to the setting and lock it. Hold the grip on its load line, pull at right angles to the handle slowly and steadily, and stop the moment it clicks. Wind it down to its lowest setting before storing it.
How do you read and set a click torque wrench?
Read the last line on the barrel that the thimble edge has uncovered, then add the thimble line that sits on the barrel's datum line. On a 40–200 N·m wrench one turn is 10 N·m and the thimble has 10 divisions of 1 N·m, so barrel 90 plus thimble 7 is 97 N·m. Always wind up to the setting from below.
Does an extension change the torque wrench setting?
A straight extension bar does not: it is in line with the drive. A crowfoot or any attachment that moves the socket along the handle lengthens the lever arm, so set the wrench lower using S = T × L / (L + E). With a 60 N·m spec, a 355 mm wrench and a 50 mm crowfoot in line, set 52.6 N·m. Turned to 90 degrees the crowfoot needs no correction.
Should a torque wrench be stored at zero?
Store a click torque wrench at the lowest mark on its scale, not below it. Leaving the spring compressed at a working setting makes it take a set, and the wrench then clicks early and reads low. Do not wind it past the bottom of the scale either.
Explore Related Simulators
- Torque & Rotation: where T = F × r comes from, with a wrench, a seesaw and spinning discs.
- Bolted Joint Design: the preload your torque buys, and the stresses in the bolt and the joint.
- Thread Nomenclature: metric and UNC/UNF threads, pitch and the stress area behind every spec.
- Screw Gauge (Micrometer): the same barrel-and-thimble scale a click wrench's handle uses.
- Hooke’s Law: why a beam wrench works — its handle is a spring that bends in proportion to the torque.
- Spring Design: the compression spring inside a click wrench, and why it takes a set if stored loaded.
- Tap Drill Chart: drilling and tapping the hole the bolt goes into.
Updated